Slatwall Installation - The Ultimate Guide to Installing Slatwall Panels
|
As one of the oldest and most respected online retailers of slatwall panels, we answer a wide array of questions regarding our products.
"How do I assemble my rack?", "How do I set up my gridwall craft show booth?", and "Where should my display table be placed in my store?" are some great examples.
The one subject about which store owners have the most questions is the installation of slatwall panels.
First things first. If you are not comfortable using power tools and have some knowledge of installing sheet wall material, we recommend the installation of slatwall panels by a licensed
and insured contractor. Before starting, obtain the necessary permits and follow all building codes.
If you choose to install your slatwall panels yourself, continue reading for helpful information to make the job easier.
|
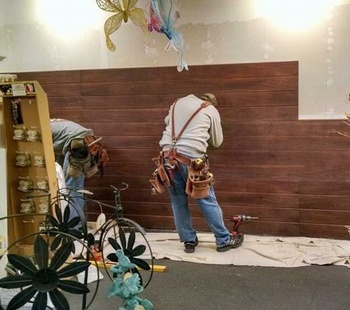
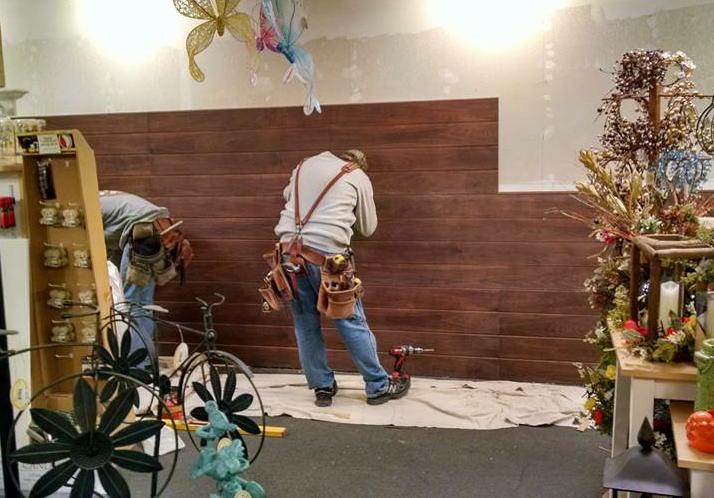
Slatwall installation in a retail store
|
You'll need a basic understanding of the slatwall display system to properly install your panels.
Slatwall
is a wall paneling material frequently used in commerical retail locations to display, store, and organize merchandise and other items.
Slatwall panels have
slots or grooves
which are used to hang shelving, hooks, wire baskets and many other accessories.
Installation of slatwall is done with screws through the slatwall grooves, not the panel face.
The slatwall panel itself is a 3/4 inch thick medium density fiberboard (MDF) material that weighs approx 85 lbs per 4ft by 8ft sheet
Installation of slatwall will require at least one helper, but two will make the job easier.
Tools and Materials for Installing Slatwall
It is important to first estimate the number of slatwall panels required to cover the desired wall. Each 4 ft x 8 ft slatwall panel covers 32 square feet of wall area.
To determine the number of slatwall panels you will need, first measure the length and height of the area to be covered (in feet).
Then, using these measurements, multiply the length times the height (in feet) to determine the total area to be covered with slatwall.
Finally, divide the total area by 32 (the square feet covered by one panel), rounding up to the next whole number.
This is the minimum number of slatwall panels required to cover this area. As with any panel material, you should order an additional 10% or more slatwall to account for cuts and waste when installing.
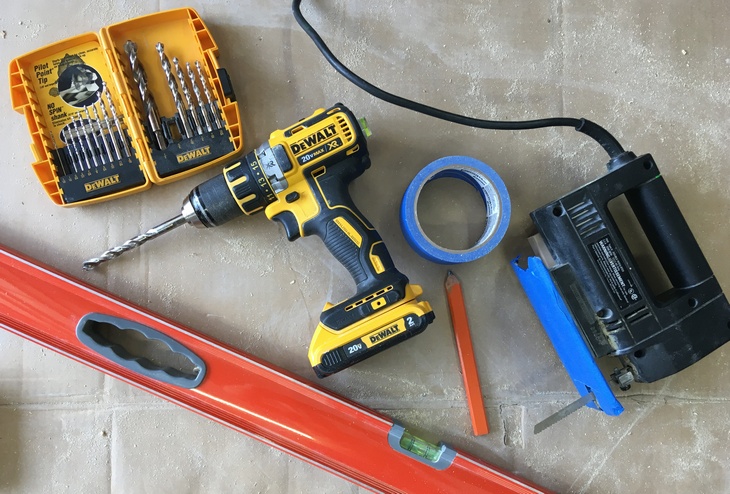
When preparing to install your slatwall, you'll need to make sure you have these tools and materials:
|
Required Tools & Materials
- Drill or Screw Gun
- 24" or longer Level
- Stud Finder
- Tape Measure
- Ladder
- Pencil
- Screws for your wall type
- Safety Glasses
|
Optional Tools & Materials
for some slatwall installations
- Drill Bits
- Circular Saw
- Jigsaw with wood cutting blades
- Painter's Tape
- Panel Adhesive
- Edge / Corner Trim
- Finish nails
- Hacksaw & Miter Box
- Needle Nose Pliers
- Scissors
|
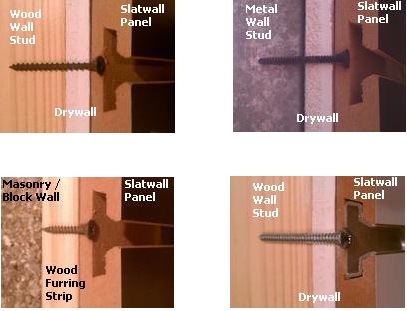
Wall Stud and Screw Types
The first step of the installation process is to determine what type of wall material and wall studs you are applying the slatwall panels onto.
For wood studs, you'll need coarse threaded drywall screws 2 to 3 inches long. Use self-tapping (self drilling) drywall screws for installation of slatwall on walls with metal studs.
These screws feature a unique tip that will drill a pilot hole into the metal stud as they are installed.
Masonry walls should first be framed with wood studs or furring strips, to meet local building codes.
The wood framework over the masonry wall will create a new surface the slatwall panels may be attached to.
Slatwall Layout
Locate each wall stud location using a stud finder and mark the location on the wall.
Slatwall is typically installed over drywall or the existing finished wall material. Slatwall may also be installed directly onto bare wall studs, if permitted by building code in your area.
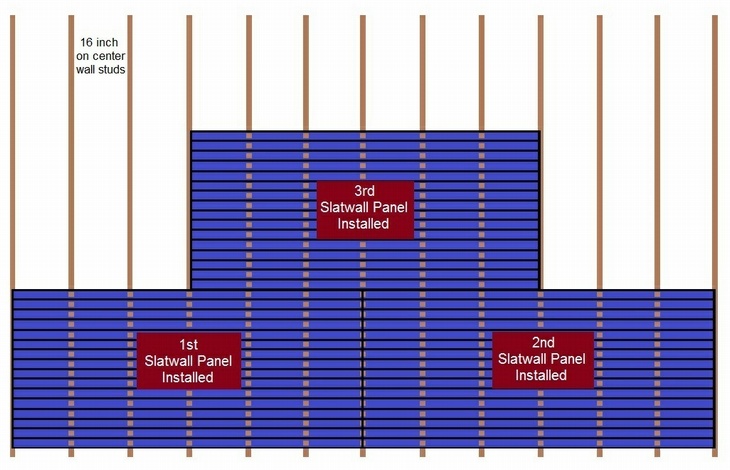
Using the wall stud locations, visually layout the slatwall panels on the wall, staggering the vertical seams as shown below. Wherever possible, install the panels so each end is fastened to
a wall stud. This will keep the slatwall panel from pulling away from the wall if items are displayed near the panel edge. For wall studs spaced 16 inch on center, both ends of a 96 inch (8 ft) wide
slatwall panel should end on a wall stud.
Once you have determined the layout of your slatwall panels on the wall, measure and mark the stud locations on the grooves of each slatwall panel. This will provide the screw locations to attach each
slatwall panel to the wall.
Install the first slatwall panel using screws into each stud, and spaced vertically approximately every 12 to 16 inches.
The first slatwall panel on a wall will be the most important, as all other panels will be aligned from this panel. Using a level, check each panel as it is installed to ensure it is level and plumb.
If the bottom edge of the slatwall panel is not installed on the floor, first install an 8ft 2x4 or 2x2 as a ledger board to support the panel at the desired height.
For a more permanent installation, a general purpose panel adhesive may also be applied to the back of each slatwall panel before hanging.
Slatwall with Aluminum Inserts
|
If your slatwall panels have
aluminum groove inserts,
use 2 to 3 inch, #6 or larger, pan head screws. Ensure the screws you use have a small enough head to fit through the front of the slatwall groove,
to prevent chipping the panel during installation.
After marking the wall stud locations on the aluminun groove inserts, predrill each screw location in the aluminum groove, using a drill bit slightly larger than the threaded portion of the screw.
Do not remove the aluminum groove inserts during installation, as they maintain the strength integrity of the panel.
The screws should then go through the pre-drilled holes in the aluminum groove insert and into the wall stud to secure each slatwall panel.
When installing one panel above another, you will need to add an additional aluminum groove insert in the slot where the 2 panels adjoin.
Install the lower slatwall panel, then place the insert into the half groove of the lower slatwall panel, before the upper panel is attached to the wall.
|
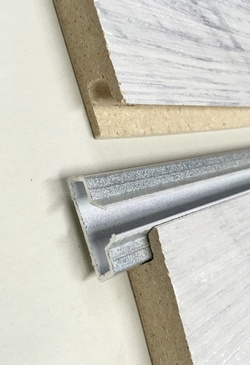
Aluminum insert between 2 slatwall panels |
Cutting Slatwall Panels
Slatwall panels can be cut easily with planning and patience. Take your time, measure twice and cut once.
To make straight cuts use a circular saw and cut the panel face DOWN.
Use a sharp blade with 60-80 teeth and set the blade depth to 1 inch or just enough to cut through the slatwall panel.
Using a rip fence, straight edge, level, or edge of another slatwall panel as a guide will help to keep cuts straight and accurate when using a circular saw.
To make irregularly shaped cuts in slatwall, including electrical receptacle and switch cut-outs, use a jig saw with a medium wood cutting blade, approximately 10 teeth per inch.
Place a few pieces of blue painter's tape on the deck of the saw to prevent it from scratching the finished face of the slatwall.
Use a tape measure to locate where the cut-out will need to be on the slatwall panel and mark the location.
Drill 2 holes at opposite inside corners of the cut-out, using a 1/2 inch drill bit so your jigsaw blade will fit into the holes.
Then use the jigsaw to complete the sides of the cut-out.
When making cut-outs in slatwall for electrical switches and receptacles, you will need to add a 3/4 inch
electrical box extender, using longer machine screws, to meet electrical building codes.
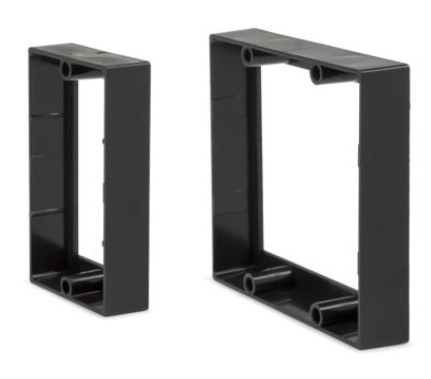
|
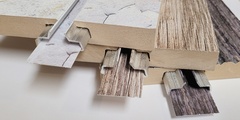
Finishing and Trim
Slatwall panels usually look best when installed continuously from the floor to the ceiling.
For any unfinished side, top, or bottom edges of slatwall,
edge trim
may be used to conceal the edge and create a professional appearance.
This trim is usually a 3/4" angle molding or U-shaped molding in either wood or aluminum. Wood trim may be easily cut to length with a hand saw, circular saw, or miter saw, and installed with finish nails.
Aluminum trim provides more protection and durability than wood trim, but it will need to be pre-drilled and installed with small screws.
Aluminum edge trim may be cut to length using a miter box and hacksaw.
|
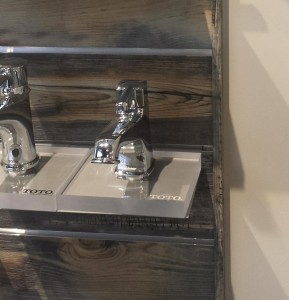
Color matched slatwall edge trim
|
Corner trim
may also need to be installed on any inside or outside corner where 2 slatwall panels meet. These areas may have small gaps and visable unfinished slatwall edges that will need to be covered.
Typically a 3/4" quarter round style molding is used for this purpose, as it has a rounded finished side and installs between two 90 degree surfaces.
After installation, the visible screw heads in slatwall grooves / slots may be covered using colored
slatwall groove inserts.
This flat PVC strip adds color to the grooves and covers both the unfinished slatwall groove and the installation screws.
Insert the strip at one end of the groove and pull it to the opposite end using needle nose pliers. Cut the strip to length with scissors and repeat the process for every groove on the slatwall panel.
If no exposed end is available on the panel, the strip may also be installed by pushing it into the groove from the front of the slatwall.

|
Slatwall Accessories
Now that you've installed your panels it's time to add
slatwall accessories
to add flexibility to your store display.
From
acrylic sign and literature holders
to
rustic designer style
pipe accessories,
there is a slatwall accessory to display virtually any type of merchandise.
It's this flexiblity and ability to adapt your display as needed that makes slatwall such an amazing wall display material!
As always, we wish you success with your retail display project and hope you found this information helpful.
|

Designer Slatwall Pipe Accessories
|
|
RELATED POSTS
Slat-Design 3D Textured Slatwall now shipping with color matched inserts strips!

Tire Tread Slatwall is the hottest new finish in our 3D Textured Slatwall Panel Line!
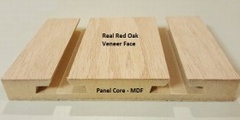
Melamine Slatwall Panels vs. Veneer Slatwall Panels Explained

Excel Sports uses Walnut Textured Woodgrain Slatwall to Add Warmth to their Colorado Retail Showroom
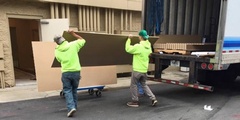
The Ultimate Guide to Receiving Your Freight Shipment From AAADisplays.com
|