
RELATED DISPLAYS:
Body Forms
|
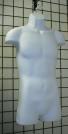
Create hanging clothing displays on Gridwall with
our our
Hanging Body Forms
|
|
Garment Racks
|

Display hanging garments and clothing in unused floor space
with our freestanding
garment racks
|
|
Gridwall Installation and Assembly Instructions
Home >
Gridwall Panels /
Gridwall Accessories
> Gridwall Installation and Assembly Instructions
Gridwall Panels & Displays
 Gridwall
is a heavy duty wire display system used in retail stores, outdoor displays,
garages and warehouses.
Gridwall Panels feature an industry standard 3 inch on
center spaced wire pattern that accepts a multitude of
hooks, brackets,
shelves,
baskets and
hanging display accessories. We offer gridwall panels
in powder coated white, black, and chrome finishes, making it ideal for
outdoor use. Gridwall panels may be used freestanding, wall mounted,
with legs, or on rolling bases. Gridwall displays can be seen in use at retail
stores, kiosks, fairs, malls, shopping centers and trade shows everywhere.
Our gridwall is constructed of heavy duty 1/4" thick steel wire with a
reinforced double wire edge on the longest 2 sides of the panel.
Gridwall
is a heavy duty wire display system used in retail stores, outdoor displays,
garages and warehouses.
Gridwall Panels feature an industry standard 3 inch on
center spaced wire pattern that accepts a multitude of
hooks, brackets,
shelves,
baskets and
hanging display accessories. We offer gridwall panels
in powder coated white, black, and chrome finishes, making it ideal for
outdoor use. Gridwall panels may be used freestanding, wall mounted,
with legs, or on rolling bases. Gridwall displays can be seen in use at retail
stores, kiosks, fairs, malls, shopping centers and trade shows everywhere.
Our gridwall is constructed of heavy duty 1/4" thick steel wire with a
reinforced double wire edge on the longest 2 sides of the panel.
Gridwall Legs
 Gridwall panels may be used as freestanding displays in a variety of ways.
Two
gridwall legs will make any individual gridwall panel freestanding.
Our T-style legs provide the greatest support and stability for a gridwall panel.
We also offer
L-shaped legs
for use with lightweight items on 2x5 or smaller
size gridwall panels.
Gridwall panels may be used as freestanding displays in a variety of ways.
Two
gridwall legs will make any individual gridwall panel freestanding.
Our T-style legs provide the greatest support and stability for a gridwall panel.
We also offer
L-shaped legs
for use with lightweight items on 2x5 or smaller
size gridwall panels.
Gridwall Bases
Gridwall bases are an easy way to create gridwall display units in
common configurations such as triangle (3-sided), pinwheel (4-sided) and gondola styles.
On rolling bases, gridwall panels will become moveable displays.
 Gridwall 3 way bases display (3) Gridwall Panels in a triangle shape. Each
side accepts a 2 ft wide panel and panels are connected on the base using
gridwall joiners. Wheels allow
easy movement of the 3 sided display.
Gridwall 3 way bases display (3) Gridwall Panels in a triangle shape. Each
side accepts a 2 ft wide panel and panels are connected on the base using
gridwall joiners. Wheels allow
easy movement of the 3 sided display.
 Gridwall 4 way bases display (4) Gridwall Panels in a pinwheel shape.
Panels are connected on the base using
gridwall joiners.
This design creates 4 separate display areas, from the front of each panel and 1 ft
side of each adjacent panel. Wheels allow easy movement of the completed display.
Gridwall 4 way bases display (4) Gridwall Panels in a pinwheel shape.
Panels are connected on the base using
gridwall joiners.
This design creates 4 separate display areas, from the front of each panel and 1 ft
side of each adjacent panel. Wheels allow easy movement of the completed display.
 Gridwall gondola bases create large displays which utilize both sides of all
display panels. Each gondola display base requires (4) 2 ft wide gridwall panels.
Panels are connected on the display using
gridwall joiners.
The resulting "I" shaped display allows complete access to the front and back
side of all gridwall panels.
Gridwall gondola bases create large displays which utilize both sides of all
display panels. Each gondola display base requires (4) 2 ft wide gridwall panels.
Panels are connected on the display using
gridwall joiners.
The resulting "I" shaped display allows complete access to the front and back
side of all gridwall panels.
Creating Connected Gridwall Displays
 Gridwall
panels are often connected to each other for the purpose of creating
freestanding displays. Grid panels may be connected together using
gridwall joiners (#12-016),
which clamp the panels together at the sides.
Use gridwall joiners between panels to connect panels together. Each joiner
is a small 2-sided clamp which is secured by tightening a center screw. Create U-shaped,
I-shaped, Zig-Zag and other freestanding gridwall designs by simply connecting panels
together at an angle with gridwall joiners. We recommend using at least 5 gridwall
joiners, where gridwall panels are connected. Evenly spacing the gridwall joiners
along the joint will keep the gridwall panels securely fastened together.
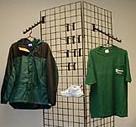
Some accessories for gridwall are also designed to connect between 2 panels.
Straight hangrails
will span between 2 facing gridwall panels, creating
a display area for hanging clothing.
Quarter circle hangrails
and
corner gridwall shelves
are also designed for creating display areas between 2 gridwall panels connected
at a 90 degree angle. These display accessories will help keep connected panels
stable, while providing display space for hanging clothing or bulk items.
Gridwall
panels are often connected to each other for the purpose of creating
freestanding displays. Grid panels may be connected together using
gridwall joiners (#12-016),
which clamp the panels together at the sides.
Use gridwall joiners between panels to connect panels together. Each joiner
is a small 2-sided clamp which is secured by tightening a center screw. Create U-shaped,
I-shaped, Zig-Zag and other freestanding gridwall designs by simply connecting panels
together at an angle with gridwall joiners. We recommend using at least 5 gridwall
joiners, where gridwall panels are connected. Evenly spacing the gridwall joiners
along the joint will keep the gridwall panels securely fastened together.
Some accessories for gridwall are also designed to connect between 2 panels.
Straight hangrails
will span between 2 facing gridwall panels, creating
a display area for hanging clothing.
Quarter circle hangrails
and
corner gridwall shelves
are also designed for creating display areas between 2 gridwall panels connected
at a 90 degree angle. These display accessories will help keep connected panels
stable, while providing display space for hanging clothing or bulk items.
Instructions for Installing Wall Mounted Gridwall Panels
 Hanging or wall mounting gridwall panels requires
wall mount brackets
to support the panels on the wall. Use a minimum of 4 wall mount brackets
per gridwall panel. The wall mount brackets will require screws depending
on the wall and stud material they are being used on.
It is always recommended to install the brackets into a wall stud.
Install the upper brackets first, with the notch
facing upward, then hang the gridwall panel onto the first two brackets.
Be sure the panel is plumb and level when resting on the gridwall brackets.
Also ensure the front of the gridwall panel is facing outward.
The front of the gridwall panel will have the horizontal wires closest to you.
Next hook the lower brackets onto the gridwall panel with the notch facing
downward and secure them to the wall. This will keep the gridwall panel
fully secure and prevent it from being lifted off of the wall mount brackets.
Repeat this procedure for each gridwall panel you will be hanging.
Hanging or wall mounting gridwall panels requires
wall mount brackets
to support the panels on the wall. Use a minimum of 4 wall mount brackets
per gridwall panel. The wall mount brackets will require screws depending
on the wall and stud material they are being used on.
It is always recommended to install the brackets into a wall stud.
Install the upper brackets first, with the notch
facing upward, then hang the gridwall panel onto the first two brackets.
Be sure the panel is plumb and level when resting on the gridwall brackets.
Also ensure the front of the gridwall panel is facing outward.
The front of the gridwall panel will have the horizontal wires closest to you.
Next hook the lower brackets onto the gridwall panel with the notch facing
downward and secure them to the wall. This will keep the gridwall panel
fully secure and prevent it from being lifted off of the wall mount brackets.
Repeat this procedure for each gridwall panel you will be hanging.
Gridwall Accessories
 Once all the installation or assembly of all gridwall panels has been completed,
the design and layout of the
gridwall accessories
must be considered.
Choosing the correct gridwall accessories is the final step in designing
the gridwall display system. A wide range of accessories, hanging displays, hooks,
brackets, fixtures,
wire displays, and
acrylic displays
are available for use on
the industry standard gridwall display system. Many gridwall accessories are also
available to display specific items on gridwall panels such as
T-Shirts,
shoes,
hats, etc.
When configuring a grid wall display, the area at eye level, between 5 ft
and 6 ft height, should display the items requiring the most emphasis and
ease of access.
Care should be taken to avoid long gridwall accessories and hooks at lower
levels, as these areas are harder to access and small merchandise could be
easily damaged by customer foot traffic and shopping carts.
Gridwall baskets
are often used to conveniently display loose items, while keeping them visible.
Signage is also an important part of a gridwall display and
acrylic sign holders for gridwall
are great for keeping items well marked.
Once all the installation or assembly of all gridwall panels has been completed,
the design and layout of the
gridwall accessories
must be considered.
Choosing the correct gridwall accessories is the final step in designing
the gridwall display system. A wide range of accessories, hanging displays, hooks,
brackets, fixtures,
wire displays, and
acrylic displays
are available for use on
the industry standard gridwall display system. Many gridwall accessories are also
available to display specific items on gridwall panels such as
T-Shirts,
shoes,
hats, etc.
When configuring a grid wall display, the area at eye level, between 5 ft
and 6 ft height, should display the items requiring the most emphasis and
ease of access.
Care should be taken to avoid long gridwall accessories and hooks at lower
levels, as these areas are harder to access and small merchandise could be
easily damaged by customer foot traffic and shopping carts.
Gridwall baskets
are often used to conveniently display loose items, while keeping them visible.
Signage is also an important part of a gridwall display and
acrylic sign holders for gridwall
are great for keeping items well marked.
Gridwall versus Slatgrid
 Both
Gridwall panels and
Slatgrid
panels are wall display panels constructed
of welded steel wire and designed to create hanging product displays. However,
Slatgrid panels have a unique horizontal wire design which allows them to accept
most
Slatwall Accessories
in addition to most
Gridwall Accessories.
This may be particularly useful in retail stores which already use Slatwall
Panels and Slatwall Accessories. Like gridwall panels, slatgrid panels may
be used wall mounted, and freestanding with legs and bases. Slatgrid panels
use the same bases, legs, joiners and wall brackets as gridwall panels. However,
unlike gridwall panels, which may be used vertically or horizontally,
Slatgrid panels may only be used vertically due to their unique wire design.
For example a 2 ft x 8 ft slatgrid panel may only be used in a 2 ft wide by 8
ft high (vertical) orientation, while a 2 ft x 8 ft gridwall panel may be used
8 ft wide (horizontally) or 8 ft high (vertically). Slatgrid panels also have a
definitive front and back side. The front of a slatgrid panel is the side with the
horizontal wires closest to you. Installing panels with the front facing outward
will ensure that hooks and accessories will fit correctly on the display.
Both
Gridwall panels and
Slatgrid
panels are wall display panels constructed
of welded steel wire and designed to create hanging product displays. However,
Slatgrid panels have a unique horizontal wire design which allows them to accept
most
Slatwall Accessories
in addition to most
Gridwall Accessories.
This may be particularly useful in retail stores which already use Slatwall
Panels and Slatwall Accessories. Like gridwall panels, slatgrid panels may
be used wall mounted, and freestanding with legs and bases. Slatgrid panels
use the same bases, legs, joiners and wall brackets as gridwall panels. However,
unlike gridwall panels, which may be used vertically or horizontally,
Slatgrid panels may only be used vertically due to their unique wire design.
For example a 2 ft x 8 ft slatgrid panel may only be used in a 2 ft wide by 8
ft high (vertical) orientation, while a 2 ft x 8 ft gridwall panel may be used
8 ft wide (horizontally) or 8 ft high (vertically). Slatgrid panels also have a
definitive front and back side. The front of a slatgrid panel is the side with the
horizontal wires closest to you. Installing panels with the front facing outward
will ensure that hooks and accessories will fit correctly on the display.
|